
Recipe & Procedure : Tuile Cookies Curls
. BAKING, Bread, butter, Cake, cookies, flours, formula, garnish, How To, Procedures, recipe, SugarThis is a formula adapted from Le Cordon Blue Professional Baking 3rd Edition. It bakes up to 90 cookies, so you may want to divide this recipe in half or maybe even thirds if making for your self. You can also make this formula ahead of time and store the batter in the fridge for up to a week before use.
TUILE COOKIE / Stencil Paste BATTER
I did mine in a kitchen aide mixer. Preheat oven for 350 F.
- 3 oz Butter
- 4 oz confectioners sugar (a.k.a powdered)
- 3 oz of egg whites
- 3.5 oz cake flour
To make the batter: Cream the butter and sugar until creamy, add sugar until mixed thoroughly. Whip in the egg whites. Sift in the flour, mix until blended. *Let the tuile batter set up for a few minutes before using.
I suggest baking the tuile on a sheet pan with parchment, or use a silipat (if you don't have one yet -- GET ONE. They rock).
You can use any sized or shaped stencil you want, just make sure the material of your stencil will hold up to the moisture from the batter.
To use your stencil : Position the stencil on the area of your sheet pan you want the cookie to bake. Use a small offset spatula, take a small tsp sized lump of batter, lay this at the foot of your stencil. Hold the stencil onto the pan - with the other hand use a forward motion - slide the side of your offset spatula the length of your stencil, use the stencil as a guide. What you are trying to achieve is a thin level layer of batter that fills up your stencil, as the excess is removed.
Once your stencil is full: Gently lift the stencil with an upward motion to release the stencil from the batter that will stick to the pan and form your specific stencil shape. What you want to achieve is a cookie that holds the stencil shape and forms equal and very evident sides once the stencil is removed - this will tell you whether you did the above procedure correctly.
Don't feel bad if your first tries end up with terrible results. Most people aren't used to stenciled cookies. Just keep reminding your self you are trying to create something yummy too. Make sure you work quickly, and if you need to halt baking for a period of time, refrigerate your batter.
Alternate method: You can spread the batter directly on the silipat and once baked you can cut into shapes. Let the shapes cool and harden, garnish away.
To Bake : You will need to stand and watch these cookies. Even more so the more batches you bake-off, as the oven temperature will increase the baking of your tuile cookies the further along you are. Bake your cookies for 5 minutes. Take them out when you just notice the very edges browning.
To Make "curls": After you have pulled the tuile cookies out of the oven, When they have been out of the oven for 30 seconds, quickly slide a spatula under them (while still warm) use a rounded stick (such as a dowel or even a thick wooden spoon handle) and wrap each softened cookie around the stick to your liking. Let it cool, and then remove the hardened cookie from the stick.
You can also bend them over a rolling pin or other round objects to achieve a special look.
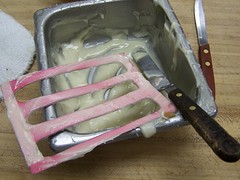
I made a simple stencil by cutting shapes out of sturdy cardboard (in this case a cake box) with an exacto knife.
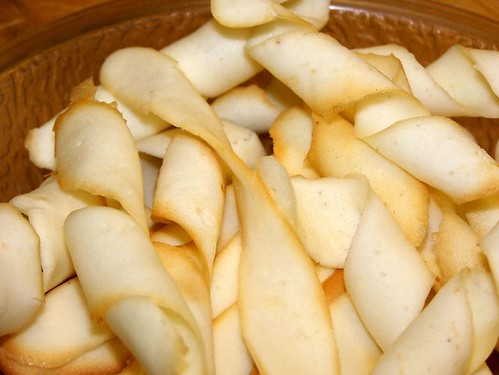
Here is the finished product.


