Food Photography #2: Three Flavors of Light 47
. food photography, Food Porn, grilled veggie salad, How To, Lighting in Photography, Milwaukie, Portland, Spinwave Photo, Spring Creek Coffeehouse Deli Today, let's take a look at some of the different flavors of basic lighting: Ambient Lighting, Built-in Flash, Off Camera Flash.
“The quality of light by which we scrutinize our lives has direct bearing upon the product which we live, and upon the changes which we hope to bring about through those lives.” - Audre Lorde
“The quality of light by which we scrutinize our lives has direct bearing upon the product which we live, and upon the changes which we hope to bring about through those lives.” - Audre Lorde
.jpg) |
| ©2012 Lee/Spinwave Photography Click to enlarge photo. |
Lighting Flavor #1: Ambient lighting
Ambient simply refers to the existing light. Ambient light can come from sources such as the sun, light bulbs, or candles. That doesn't mean the existing light sources can’t be manipulated to suit your needs. You could change the angle you shoot at, turn lamps on or off, move a candle to a different location, or use bounce cards to boost the amount and angle of the light.
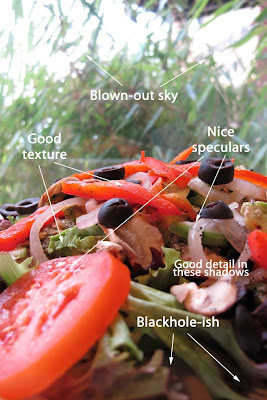
To see what the ambient looks like, set the camera to “P” mode (it’s just like auto, except you can set the ISO and turn the flash on/off yourself). With the ISO set to 100 and the flash off, the Canon G12 calculated f/2.8@1/25th and took this:
 |
| Click to enlarge photo. |
That’s actually a nice photo and most people would be really happy with that (there’s a reason people say, “P’ is for ‘perfect’ “). I see gentle, mostly-even diffused light, adequate detail and texture, with enough specular highlights and shadows for visual depth.
There are, however, two things that really bother me. The first is the black-hole-ish area in the lower right-hand corner. This is a natural consequence of all the light coming in from one direction. The other is the blown-out sky that distracts you from the real subject of the photo, the food.
So how do we reduce the background brightness? The first thing most people think of is to simply dial down the exposure compensation. That’s moving in right direction, but this is a global adjustment and will darken the subject as well as the background. If only we could separate the two! Oh wait—we can, by setting the camera to manual mode and adding some light with a flash.
Lighting Flavor #2: Built-in flash
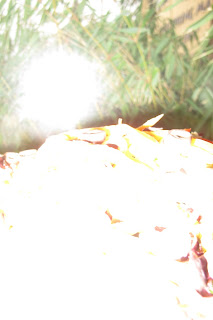
I turned the on G12’s built-in flash, turned the mode dial to “M”, set the aperture to 2.8 and increased the shutter speed to 100 to darken the background.Whoa! Too much light on the subject! Using the G12’s menu system.
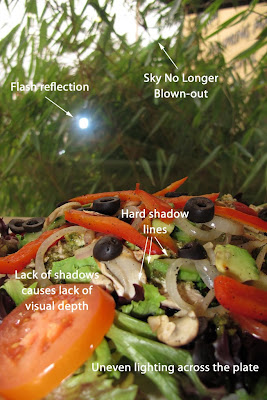
I adjusted the flash output as low as possible (1/3 power) and tried again:
Now that’s more like it. Increasing the shutter speed from 25 to 100, darkened the background. But now we have a different problem: the salad is only half-lit due to the position of the G12’s built-in flash.
A bounce card could help balance the lighting, but it wouldn’t get rid of the flash reflection in the window. And depending on the angle of the bounce card, a second reflection might show up.
Lighting Flavor #3: Off-camera flash
Time to bring out the big gun. Flash gun that is (or strobe, or external flash, or Speedlight, or Speedlite). I’ll stick with the term “flash“.
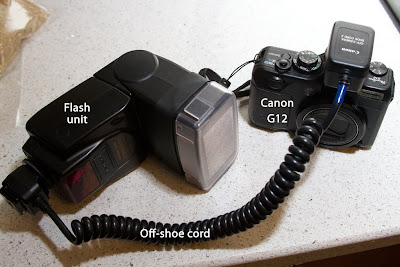
We could simply place the flash directly in the G12’s hotshoe. But without a nearby white ceiling or wall to bounce the flash off of (another lighting flavor for another day) this would create a similar effect as the built-in flash. We really need to get the flash off the camera body to control the direction of the light.
The easiest method of using a flash off-camera is by using an extension cord. In this case I used a Canon OC-SC2 cord (these were replaced by the OC-E3 a few years ago, but they have the same functionality). When paired with a compatible flash, all the TTL metering info is sent through the cord to the flash for a (hopefully) perfect exposure.
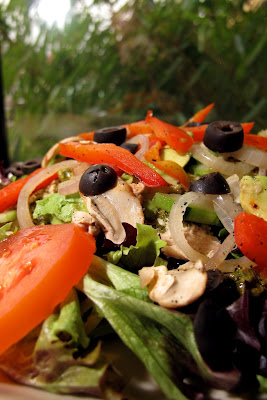
I dialed the flash down to -1/64th power and experimented with the flash in several positions, settling on 45-degrees to camera left and about 60-degrees above the plate:
Excellent speculars, shadows, depth, color and detail. With just a little bump in contrast and sharpness in post-production, we get the final image at top of post. (all other photos are straight out of the camera). Special thanks to Ed at Spring Creek Coffeehouse & Deli for the excellent Grilled Veggie salad (mixed greens, grilled onions, grilled bell peppers, grilled mushrooms, tomato, cucumber, avocado, feta, and olives) and for allowing me to photograph on location.
My apologies to readers for the lack of set-up photos. All of my assistants had scheduling conflicts for this shoot.
The tools: Canon Powershot G12, Quantaray QWC-900WA flash, Canon OC-S2 off-shoe cord; post-production in Apple Aperture.

