28 December 2008

Recipe: Fresh Fruit Napoleons with Blackberry Curd 40

I did these blackberry curd & fresh fruit napoleons a while back for restaurant baking. I wished I would've had time to get better pictures.


This recipe is more suited for summer, but when winter rolls around, and the holidays have past - it is refreshing to see desserts that awaken memories of summers past - and that reminds you summer is right around the corner.


Fresh Fruit Napoleons
This recipe yields 20 servings.

16 sheets of frozen phyllo dough
1 cup butter (melted) [you can substitute "butter flavored" baking spray or earth balance sticks]
1/2 cup crystal sugar
2 cups blackberries
1/2 cup water
1 teaspoon orange zest
1 cup sugar
4 tablespoons cornstarch
2 tablespoons cold water
4 1/2 cups mixed berries (strawberries, raspberries, blue berries)

Whipped topping,
or hand whipped cream,
or sweetened whipped marscapone cheese

Pastry Procedure:


Preheat oven to 350 °F.

Now as stated in my former post (Recipe: Banana - Rum Napoleons) you need to work fast and follow certain guidelines when working with phyllo {Tip: When you are working with phyllo dough it is best to have a tray to lay out the sheets, then keep totally covered, under a damp kitchen towel. If exposed to air, the moisture from the phyllo dough will be wicked out and it will become dry and brittle - which means non workable for you. So work quickly.]

You will need 2 half sheet pans (jelly roll) lined with parchment, to bake 10 sheets on each pan.

Place a sheet of phyllo onto a jelly roll pan, brush with melted butter. Sprinkle crystal sugar. Top with another phyllo sheet and repeat these steps until 10 sheets are used. Make sure to repeat butter & sugar on the last (top piece). Repeat with second sheet pan.

Using a ruler - score each pastry stack with a pastry wheel or sharp paring knife into squares or rectangles of equal measurements. Bake in the preheated oven 10-12 minutes (pastry should be golden and crisp). Allow the baked pastry to cool. Do not handle the pastry until building your napoleons or the baked phyllo squares may crack.

Blackberry Curd Procedure:

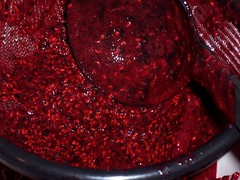
In a sauce pan combine the blackberries, 1/2 cup of water and orange zest. Bring to a boil. Reduce heat and let simmer for 5 minutes more. Scrape berry contents into a food processor and pulse until smooth. (if you don't have a food processor, you can place the berry contents in a sieve over a bowl and using a ladle , gently push and rub the contents against the mesh, repeat this until most of the contents have been filtered through the sieve into the bowl. This will leave behind seeds and a few skins from the berries).

Return the berry contents back into the sauce pan (on medium heat) - stir in 1 cup of sugar and 4 tablespoons of butter.

Combine the cornstarch & cold water in a small bowl stirring briskly. With a wire whisk add the cornstarch mixture to the berry contents in the saucepan . Stir until thick and bubbling. Stir for 3 minutes more. Remove from heat , scrape into a bowl, cover with plastic wrap - allow to cool for 2 hours or over night.

Napoleon Assembly:

Place a small dallop of blackberry curd onto the center of your serving plate.
Place a baked phyllo square (sugar side down), add 1 tablespoon of curd onto the center of the pastry square. Add (by pressing) enough of the mixed berries to cover the blackberry curd.

Finish by piping or adding rounded dollops of your favorite topping (Whipped topping,
or hand whipped cream, or sweetened whipped marscapone cheese) then add another pastry squared (sugar side up) to top.

There are many ways to finish this dessert , you could make it much fancier than this- drizzling berry syrup onto it, or around the base, using pastry cream on top of the blackberry curd - the combinations are endless.


Related Posts:


13 July 2008

Summer Bursting with Strawberries 20

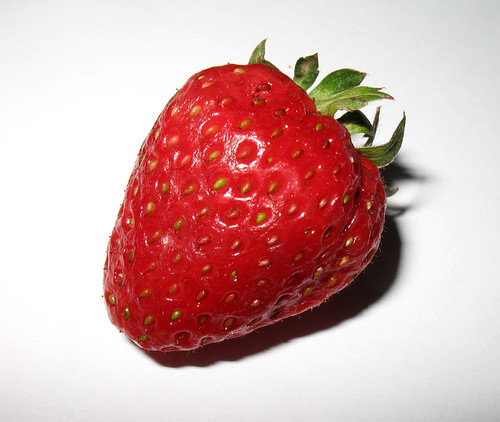
Summer brings with it an array of many fruits ,vegetables and herbs - each plant basking and feeding off the warm glow of seemingly endless days. With such an abundance of life giving light - is it any wonder that strawberries thrive in these months?


picture courtesy of Bahadorjn

The fleshy sweetness invokes heavenly sighs when coupled with special desserts. Biting into the firm, juicy flesh, your tongue first experiences a tang, but that is overcome by the beautiful sugary blast of flavors.

Strawberries hold a special place in my taste memory. To me they equal the unbridled innocence of childhood - memories of summers long ago , when the sun was ablaze. Summer days as a child with my friends, I would run out into the hills and forests, and creeks or ponds - never a tricky thought clouding my mind, only a determination to experience and cover as much ground as humanly possible - before the sun set below the purple hills. Strawberries were a staple in my house, and more often then not desserts like strawberry shortcake, or just the simple act of dipping a berry into fresh whipped cream, were enough to satisfy a craving for sweetness.


Below is a weight to volume ratio chart for strawberries in their different states:


weight to volume ratio changes if berries are halved, quartered, sliced etc.
(See below)

1 (16 oz.) clamshell package equals approximately:
Whole Unstemmed 18 each 17.2 ounces
3 to 3 1/4 rounded cups
1 cup = 6 or 7 strawberries
Whole Stemmed 15.5 ounces
3 to 3 1/4 rounded cups
1 cup = 6 or 7 strawberries
Halved 15.5 ounces
3 to 3 1/4 rounded cups
1 cup = 6 or 7 strawberries
Quartered 15.5 ounces
3 to 3 1/4 rounded cups
1 cup = 6 or 7 strawberries
Sliced 15.5 ounces
3 rounded cups
1 cup = 6 or 7 strawberries
Chopped 15.5 ounces
3 cups
1 cup = 6 or 7 strawberries
Pureed 15 ounces
1 3/4 cups


link to California Strawberry CommissionIf you would like more info on strawberries, California Strawberry commission offers recipes, health and nutritional info.

They also have a really cute site just for kids aged 5-12 yrs , with lots of kid friendly recipes you and your children can make together, and fun activities on strawberry education, called Strawberryville.

The University of Florida also has a great page outlining different varieties of strawberries and where they can be grown, plus illustrations on strawberry shapes - very interesting.


Related Posts:


21 May 2008

Food Photography : Banana - Midori Strawberry torte 12

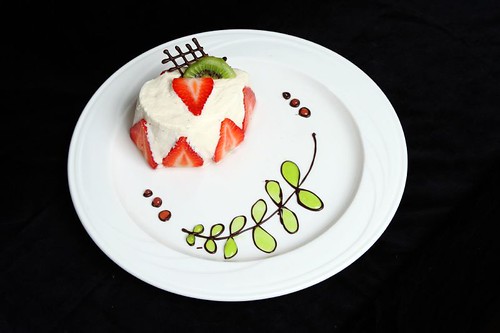
plated desserts 010


An oval cookie cutter was used to cut out 3 layers of French sponge. I used a slightly larger size of the oval set and lined it with an acetate strip. I used sliced strawberry to line the acetate , point upward and then added banana mousse. I pushed a layer of the French sponge into the mousse, which distributed the mousse into the areas that weren’t filled by the strawberry. I continued to add mousse then a layer of sponge, and then used a small offset to comb the top smooth. I let this set in the reach in for several hours, then peeled the acetate off.

The dessert was placed on the upper left side, off center. It was garnished with a chocolate design and a half kiwi slice following the line of the chocolate design.

A tempered chocolate fern design was piped onto the plate. It was filled with honeydew-Midori sauce. Descending circles were piped of chocolate on each side of the dessert and strawberry sauce was used to fill the circles.


I will post the full dessert costing presentation tomorrow.


Related Posts:


11 April 2008

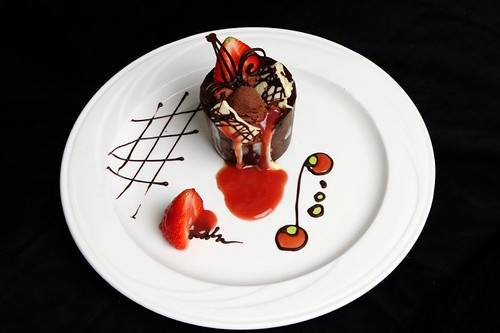
Food Photo : Chocolate Mousse with Strawberry Sauce 3

30 March 2008

Dessert Costing : Banana Strawberry Torte 3

This post is referencing a previous post dated Feb. 11 2008 : Food Photography : Strawberry Banana Torte

So David here are those details, as promised. I created this post using Google Docs. Google Docs rocks my blogger socks off! I can just click a button and post a nicely formatted post. I plan to use this tool more in the future.

The purpose of this post is to show you readers how to find a base cost for a plated dessert and what goes into those calculations


Costing Formulas:

☆ Ingredient weight (divided by ingredient unit cost) = ingredient cost per lb/oz
☆ Ingredient cost per lb ( divided by number of oz) = cost per oz
☆ Ingredient cost per oz/lb multiplied by formula ingredient weight = final ingredient cost. ☆ Final ingredient costs added together = total dessert cost
☆ Total dessert cost ( divided by dessert serving number / weight) = per serving cost
☆ Per plate cost added to garnish/decoration cost = total per plate cost

# = lb

Ingredient Cost per unit Cost per lb Cost per oz Ing. weight final cost Used in
Milk 4# = $1.59 0.40 .03 1.5 oz .05 French sponge
G. Sugar 50# = $25.70 0.57 .04 6 oz .24 sponge
Egg 18# = $16.80 .93 .06 2.5 oz .15 sponge
Cake Flour 50# = $9.99 .20 .01 4 oz .04 sponge
AP Flour 50# = $11.94 0.24 .02 2 oz .04 sponge
Vanilla ext. 8# = $65.40 $8.16 .51 .125 oz .06 sponge
B. Powder 10# = $12.90 $1.29 .08 .17 oz .01 sponge
salt 25# = $7.30 .29 .02 .05 oz .01 sponge
Butter 36# = $52.56 $1.46 .09 1 oz .09 sponge


Banana Scented Marscapone
Ingredient Cost per unit Cost per lbs Cost per oz Ing. weight final cost Used as
Marscapone #3 = $7.76 $2.59 .16 8 oz $1.28 frost
Banana Compound 38.8 oz = $13.50 $5.60 .35 1.5 oz .53 frost
G. Sugar 50# = $25.70 0.57 .04 .04 4 oz frost
Vanilla Ext. 8# = $65.40 $8.16 .51 .25 oz .13 frost

Total ------ ----- $1.58 .10 -------- Dessert


Strawberry Sauce
Ingredient Cost per unit Cost per lbs Cost per oz Ing. weight final cost Used as
Strawberry Puree 2.2# = $10.51 $4.96 .31 8 oz $2,48 sauce
G. Sugar 50# = $25.70 0.57 .04 8 oz .32 sauce
Water -------- ------ ----- 12 oz ----- sauce

Total ------ $1.60 .10 ----- ------- garnish


Midori Simple Syrup
Ingredient Cost per unit Cost per lbs Cost per oz Ing. weight final cost Used as
G. Sugar 50# = $25.70 0.57 .04 8 oz .96 syrup
Midori liqueur 24 oz = $20.95 $13.92 .87 4 oz $3.48 syrup
Water -------- -------- ----- 4oz ---- syrup

Total ----- $2.74 .17 ------
garnish


Honeydew - Midori Sauce
Ingredient Cost per unit Cost per lbs Cost per oz Ing. weight final cost Used as
Honeydew puree .62 per melon ------ ------ ¼ melon .16 sauce
Midori liqueur 24 oz = $20.95 $13.92 .87 2 oz $1.74 sauce
G. Sugar 50# = $25.70 0.57 .04 8 oz .32 sauce
Midori simple syrup ----- $5.92 .37 6 oz $2.22 sauce
Cornstarch 25# = $14.98 .60 .04 .75 oz .03 sauce

Total ----- $4.48 .28 ---- ----- garnish


Dessert Garnishes
Ingredient Cost per unit Cost per lbs Cost per oz Ing. weight final cost Used as
Choc. Plate Design 11# = $36.19 $3.59 .22 ¼ oz .06 garnish
Strawberry Sauce ----- $1.60 .10 ¼ oz .03 sauce
Honeydew-Midori sauce ------- $4.48 .28 .5 oz .14 sauce
Fresh strawberry 1# = $1.99 $1.99 .12 2 oz .06 garnish
Fresh Kiwi .33 each ----- ---- 1/5 kiwi .07 garnish
Choco. Decoration 11# = $36.19 $3.59 .22 ¼ oz .06 garnish
Strawberry puree 2.2# = $10.51 $4.96 .31 .5 .16 Dec.fill


Dessert Cost
Total Cost No. Servings Per Plate Cost Garnish cost Final Plate Cost
$1.24 8 .16 .58 .74

These prices reflect the cost of making the dessert alone by ingredients involved and do not reflect the menu cost delivered to the restaurant customer. There are many ways to calculate the menu cost of an item, which includes using specifc formulations to calculating labor cost and a variety of other factors.


numly esn 48210-080330-399239-18 Rate content:

© 2008 All Rights Reserved. No Portion of these formulas or document may be reproduced or copied without permission.

12 May 2007

Photography : Blackberry Granita w/ Banana Mouse 3


*Plated desserts. All made from scratch. This blackberry granita in pilsner glass is garnished with banana mouse, raspberry sauce drizzle, two lemon peel spears and fresh blackberries. On the plate are two piped chocolate tears filled with mango sauce and accented with raspberry cloverleafs.
I have been away from blogging and the cyber world for a year....my Google PR reflects that. Ha. Well I am here to tell you I will be sloughing off these feeble embers and stoking this blog into a great foodie fire! VIVA LA CULINAIRE! More to come?!...


22 July 2006

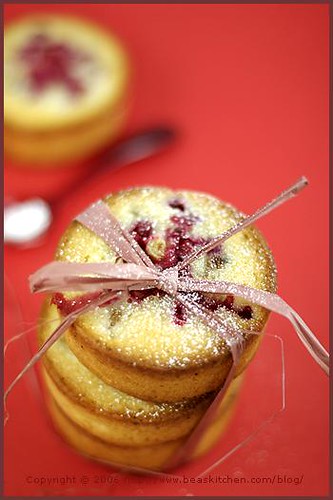
Foodie links/photog : Red Currant Mini Cakes 2

Wow. What a beautiful picture, I found this while browsing the flickr group I manage : Artisan Artistry , a group for photographs that feature handmade breads/confections/desserts. SO far there are 122 members.

Red Currant Mini Cakes, originally uploaded by La tartine gourmande. 
Here are the most recent group stats:

 Baking  Artisan Artistry. Get yours at flagrantdisregard.com/flickr


La Tartine Gourmande  has a tantalizing photo stream.
Visit the food blog for luscious Recipes ---
Red Currant Mini Cakes can be found here .
Flickr has over 4,500 groups which are food related. Yikes...foodie heaven or hell ? You be the judge...

19 July 2006

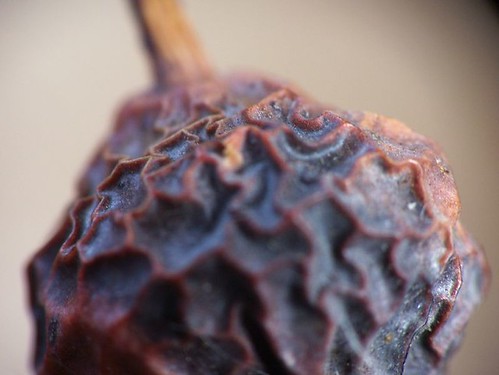
Photog : of a dried berry | Reverse Macro How To 4

By adding a traditional 35mm film lens in reverse, in front of my digital lens, I was able to capture the details of this dried berry. This was the natural coloring. I thought it was quite beautiful.

Reverse Macro of a dried berry, originally uploaded by Amber *.
To Create your own reverse macro:
  1. Select a digital camera with at least 4mps. One with a larger lens opening than a standard "point & shoot" camera - when I mention point & shoot I am talking about the cameras with very small (dime - nickel sized) lens holes. I didn't have an DSLR with standard 35mm equivalent to use (my camera has a 28mm equivalent which worked great). The bigger lens hole will enable you to capture the light given off from the 35mm lens. To make this kind of shot, a built in flash is worthless, because the added length of both lenses creates a tunneling effect. It also helps to have a zoom power greater than 3, my camera has 10 optical zoom and 8 digital.
  2. Find a telephoto 35mm lens (you can experiment with different sizes and ranges), I used a [55mm - 117mm ] Pentax telephoto. It should have a lens lip or hood of at least 1/4 inch (this is found at the protruding end) or wider. This lip will allow you to hold the two lenses comfortably in one hand, but also position your lens close to the 35mm lens, and at the same time create a light barrier. A smoother, slide roll type barrel extender works better here too -- as this enables you to use light touches to adjust the magnification (i.e zoom) of the 35mm lens.
  3. Find a place to photograph your macro. It should be flooded with natural light (fluorescent lights or ambient light will not produce good results) a good time of day is in the early morning, or around 4 p.m, on a bright day. There should not be any object to create and caste shadows.
  4. Find your subject. This technique allows you to magnify the finest details --- like dust particles or tiny ridges, so find something that isn't necessarily interesting on it's own --- but would be neat in magnification.
  5. Position your subject. A box below your subject will prop it up so you aren't lurching over your subject. Try to position it in full light.
  6. Getting Ready For the Shot. Get situated in a comfortable stance, as this will take several shots and lots of adjusting to get it right. Position your hand around the bottom of your digital camera lens so that it is cradled in your hand. Make sure only half of your hand (i.e pinky and ring fingers) is touching that lens, as the rest of your hand (i.e middle, pointer and thumb) will be holding the 35mm telephoto lens steady in front of your digital lens. A safe spacing between the two is 1/4 "- 1/2 inch. DO NOT let your lenses touch each other --- as this will lead to scratching!! Position the lenses and then position the camera and lenses in front of your subject.
  7. Focus, focus , focus. The trick is to learn to focus your digital to pick up on the finer adjustments of the 35mm telephoto lens. I zoomed in with my digital half way, then I would move the telephoto to magnify more and more, all the while gently focusing with the telephoto. You will need to shift around your subject to create better shots. Try different distances and zoom.
  8. Practice, practice, practice. Get a feel for your camera and the two lenses working in sync. Try a variety of subjects and light strengths --- this will take a lot of shots and trial and error, so have your memory card handy.

07 May 2005

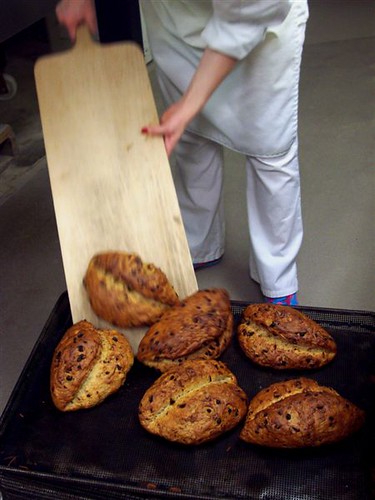
Hazelnut -currant bread 0


Hazelnut -currant bread, originally uploaded by Culinarynovice.

Fresh from the oven. Falling from the peel into a perferated pan to let cool.

30 April 2005

Roses & Cherry Lambic 2


petals 010
Originally uploaded by abstract2concrete.

Valentines day, soo overrated. Yet I happily except my roses & Merchant Du Vin Cherry Lambic Ale...& Chinese food [orange chicken & chowmein..yumm].

Actually the past few days have been sketchy to say the least. We had a family emergency, & so my husband was gone for 2 days , and didn't get home until late. I told him not to do anything. What a sweet gesture.

My love affair with lambic ale started when I had just turned 21 yrs old. I personally like peach better than all the other flavors. {I detest raspberry} I am not a "girly" drinker. I don't like really fruity mixed drinks either.

I'll take a Mack & Jack's African Amber Ale any day. Sadly it is only available on tap. A few of my favorite hang outs seem to cater to that.

As for fermented beverages- I am partial to Amber ales , & Guinness stout, & a few select Lagers.

And of course wines. I am partial to syrah , and reislings. I like most reds - if they are well aged.

And since alcohol is the subject for this post, my mixed drinks of choice are kamikazes & vodka-crans.

I don't do much drinking. I am always busy with chasing my toddler - no time to relax. Nights out are few and far between.

24 April 2005

Link: What's Baking - Beautiful Photos of A Pastry Chef's Creations! 0

I don't know how I missed this site! Here IS A preview:
raspberry mouse w/ ribbon cake


Go here to see

07 April 2005

Singing out my Passion! 0

I was asked to do a wedding cake this last summer.

It was a 3 tier [12,9,6 in] white sponge cake filled with champagne
flavored Italian meringue Buttercream, raspberry syrup, Then frosted with
raspberry flavored Italian meringue Buttercream. With marzipan leaves & purple rosettes.

And That was only the second cake I had done{scratch} since working at the bakery, five years before. It turned out lovely. And I realized once again where my passion keeps pulling me -- to all things pastry. And this in turn is echoed in the many books and tools which litter my kitchen.

05 March 2005

Formula : Black Forest Cherry Gateau 12

morello cherries by Jeppestown


Serves about 8 but if you are dessert challenged you may slice thin & get about 10 - 11 pieces.
Recipe adapted from Desserts: Mouthwatering Recipes for Delectable Dishes

(fyi - these are UK measurements - need to be converted to US standard)


For The Cake:
  • 6 eggs
  • 7 oz. Sugar
  • 1 tsp. Vanilla essence
  • 2 oz. All purpose Flour
  • 1/2 Cup Cocoa powder
  • 1/2 Cup unsalted butter, melted
For The Filling/Topping :
  • 4 Tbsp. Kirsch
  • 2 1/2 Cups whipping cream
  • 2 Tbsp. powdered sugar
  • 1/2 tsp Vanilla Essence
  • 1 1/2 jars of stoned Morello Cherries, drained & patted w/ paper towel
For Finishing :
  • icing sugar for dusting
  • grated chocolate curls
  • fresh drained canned Morello Cherries {there are some great cherries packed in Kirsch , just follow the link}
  • grated chocolate
  • chocolate curls

Preheat oven to 350° F. Prep 3, 7 1/2 inch sandwich cake pans & line each with parchment paper.
Whisk the eggs with sugar and vanilla in a large bowl until pale and very thick - the batter should hold it's shape once the whisk is lifted.

Sift the flour and cocoa over the mixture and fold in evenly (don't over mix). Stir in the melted butter. Divide the batter into the 3 cake pans, with an offset spatula smooth the batter evenly.

Bake for 15 - 18 minutes, until cakes have risen & spring back when touched lightly. Leave to cool in the pans for 5 minutes, then turn out onto a wire wrack & let cool completely.

Prick each layer all over with a skewer or fork, then sprinkle with kirsch. Whip the cream in a bowl until it starts to thicken, then beat in the icing sugar & vanilla until the mixture begins to hold it's shape.


To assemble :

spread one cake layer with a thick layer of flavored cream & top with a quarter of the cherries. Spread the second layer as above, position it onto the first layer you made, then position the last, top layer.

Spread the remaining cream all over the cake. Dust a plate with icing sugar; center the cake onto the plate.

Press grated chocolate all over the sides. Add chocolate curls & cherries to the top.

For more cakes & desserts like this one check out Desserts & Pastry books.


21 February 2005

Recipe: Watermelon Gazpacho 5

I walk around . My nostrils flare with scents carried on the winter wind gusts - I know that spring is closer than ever. I am starved for spring! I want the gray bitterness to dissolve away. I need the breezes to be pleasant and the sun to warm my cheek. And I want to be thrown about with god's green tenderness.

Here is a recipe that awakens the spring from within & delights your palate.

Watermelon gazpacho

Adapted from a recipe found in Vegetarian Times

Do not puree the ingredients or this will have to be named "smoothie" instead!

  • 6 Cups seedless watermelon cubes ( [1] 16 lb whole watermelon)
  • 1/2 of a seedless cucumber, peeled and chopped
  • 1/2 of an organic yellow bell pepper, seeded & chopped
  • 3 scallions chopped
  • 1 large garlic clove, minced
  • 2 TB lime juice or lemon juice
  • 1 TB extra-virgin olive oil
  • 1/2 tsp hot pepper sauce
  • 1 Cup cold raspberry-cranberry juice
  • 3 TB chopped fresh mint

In a large food processor, combine 3 cups watermelon, the cucumber , bell pepper, scallions, garlic, lime or lemon juice, olive oil & hot pepper sauce. Process with short pulses until the mixture is just finely chopped.

Add the remaining watermelon, raspberry-cranberry juice, and mint. Process with pulses until just finely chopped.

Serves 8

22 January 2005

Meringue , sticky yet firm...Mousseline buttercream. 0

Adapted from one of my favorite books, The Cake Bible


Mousseline Buttercream


Formula :

Makes 4 1/2 cups - enough to fill and frost 2 9-inch x 1 1/2 layers or 3 9 x 1-inch layers]
Recipe starts out thin and lumpy looking and about three-fourths of the
way through, it starts to come together or emulsify and turn into a
luxurious cream.

Temperature of the butter is important - use butter that is 65 degrees
F. If it is too soft or the room too hot, the buttercream turns thin or
into a grainy, hopeless puddle.

If the mixture does not feel cool, refrigerate it until it reaches 65 to 70 degrees F. If the butter is
too cold, then suspend the bowl over a pan of simmering water and heat very briefly, stirring vigorously when the mixture just starts to melt slightly at the edges. Dip the bottom of the bowl in a larger bowl of ice water for a few seconds to cool it. Remove and beat by hand until
smooth.

Place in an airtight bowl. Rebeat lightly from time to time to maintain silky texture.
Buttercream becomes spongy on standing.

Will keep 10 days
refrigerated, 8 months frozen. Allow to come to room temperature
completely before rebeating to restore texture or it will break down
irretrievably.

    (454 grams) unsalted butter (65 degrees F - softened but cool - not runny and greasy)

    1/4 cup (60 grams) water

    5 large (150 grams) egg whites

    1/2 + 1/8 teaspoon cream of tartar

    2 to 3 teaspoons liquor of choice or optional flavorings below


*Variations:

**Chocolate :Beat in 5 ounces of melted and cooled bittersweet chocolate

**White Chocolate: Beat in 6 ounces of melted and cooled white chocolate

**Fruit: Beat in up to 3/4 cup lightly sweetened fruit puree (strawberry or raspberry) or orange, passion, lemon or lime curd.


Procedure :


1. In a mixing bowl beat the butter until smooth and creamy and set aside in a cool place.

2. Have ready a heatproof glass measure near the range. In a small heavy saucepan (preferably with a non stick lining) heat 3/4 cup sugar and the 1/4 cup water, stirring constantly, until the sugar dissolves and the mixture is bubbling.

3.Stop stirring and reduce the heat to low. (If using an electric range remove from the heat.)


first bubbles in the sugar syrup appear - signaling a temperature rise


HardBall stage[248*F]


4. Boil the syrup until the thermometer registers 248°F to 250°F (the firm ball stage). Immediately transfer the syrup to the glass measure to stop the cooking.

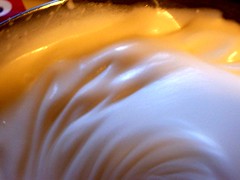
5. In another another mixing bowl beat the egg whites until foamy, add the cream of
tatar, and beat until soft peaks form when the beater is raised.


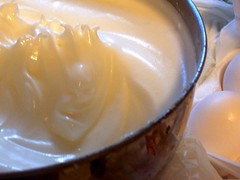
6. Gradually beat in the remaining 1/4 cup sugar until stiff peaks form when the beater is raised slowly.

stiff peaks form
Stiff peaks


7. **If using a hand held mixer, beat the syrup into the whites in a steady stream. Don't allow the syrup to fall on the beaters or they will spin it onto the sides of the bowl.

**If using a stand mixer, pour a small amount of syrup over the whites with the mixer off. Immediately beat at high speed for 5 seconds. Stop the mixer and add a larger amount of syrup. Beat at high speed for 5 seconds. Continue with the remaining
syrup.

8. For the last addition, use a rubber scraper to remove the syrup clinging to the glass measure. Lower speed to medium and continue beating up to 2 minutes or until cool. If not completely cool, continue beating on lowest speed.

9. Beat in the butter at medium speed 1 tablespoon at a time. At first the mixture will seem thinner but will thicken beautifully by the time all the butter is added.

If at any time the mixture looks slightly curdled, increase the speed slightly and
beat until smooth before continuing to add more butter.

10.Lower the speed slightly and drizzle in the liquor.


When I made this buttercream the steps I followed were :

While I started a sugar syrup {sugar & water} on the stove in a sauce
pan, stiring until the first signs of bubbling. I then set the temp on low and started the egg whites.


There are several key steps when dealing with egg whites. You must never over beat, have them in a clean mixing bowl and must temper the whites when adding syrup. But you've
got to work quickly witht the syrup or you'll end up with "pulled sugar" all over your beaters.


The beating should only continue until stiff peaks form when beater is slowly pulled away.

I must say I do well with meringue, it is easy to ruin the meringue - over beating causes it to become "foamy" in texture. The opposite of beautiful "stiff" peaks.

Once the meringue is done I added butter, slowly 1 TB at a time. After a lot
of beating the buttercream was very velvety. I must say I will use this
recipe again -- the buttercream holds flavor well and is great for
piping designs .

Once the buttercream was mixed enough, I added some berry puree - delicious! And it makes for a beautiful coloring. {just be sure to have some plain on hand before adding puree
- for decorating} I had to make one more batch.

18 January 2005

Assembly of Cake 0

Today I make cake. I have been requested to make some kind of cake with a "baby foot" theme, for a baby shower.

I ordered 2 full sheets, of devil's food[chocolate], from our cake dept.

Today I will be taking a little drive over the river to The Decorate Shop, the only cake/candy supply shop in the metro area. I need a cake box. They always have great service, and the price s aren't bad.

I wanted to do a poured ganache but I am still thinking maybe a lighter buttercream might be better. Plus I can use the white background, the colors are pastels.

I am thinking that a standard sheet cake will do the trick. Too many people for a 8 inch round.

I need to get a smaller metal spatchula [3 1/4 "] , one with a point at the end, to help smooth over the delicate decorations.

I am doing a raspberry & ganache filling. The sides will be smooth. Either a dot or basic shell border.


10 January 2005

Berry Nice Puree 0


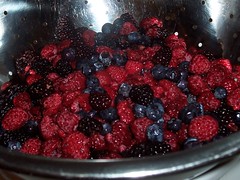
The Berries are washed in a colander.


I chose to use 3 types of berries for my puree: Blueberry,Raspberry & Blackberry. I thought it would add subtle layers of flavor.


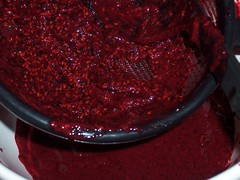
Juice and finely mashed fruit collect in the bowl.


Once the berries were rinsed thoroughly in cold water, I placed a fine sieve over a small bowl. I used a soup ladle to push the berries into the sieve, thus separating the juice and fruit from the seeds.


These are the left over seeds.


I then discarded the seeds ( did this at least 4 times) and added the fruit to my food processor.
I blended until almost smooth [do not over blend or the puree will be to thin] Added a small amount of sugar. Set aside.

This was added to my buttercream & used as a syrup brushed onto the sheet cake layers. It gives the cake flavor and also helps keep the cake moist.

After I was done the house was perfumed with berries, quite honestly it reminded me of summer.

14 December 2004

Recipes of interest : stuff me! 0

I have created another stuffing as follows :

gluten free cranberry apple stuffing
Image credit elana's pantry
Recipe:
1 whole yellow onion loosely chopped
2 TB of minced garlic.
4-5 stalks of celery, chopped into small pieces


melt 3 TB unsalted butter, in a saute pan
on high heat, turn down to medium, toss
in onion/garlic/celery. Saute.When onions are transparent and celery soft - remove from heat. Transfer to large heavy bottomed pan. Add a small amount of Porcini Mushroom oil
After 3 minutes add :

1 bag (8oz) dried cranberries.
16 oz. of Chicken stalk
2 Tb thyme, or other herbs


In same saute pan ad :

1/2 cup finely chopped pecans
1/2 cup finely hazelnuts

1 TB butter
A bit more porccini mushroom oil


Brown the nuts for 2-3 minutes ( you will smell a slightly toasted aroma). 

Add to the larger pan, put the pan on medium heat, stirring ingredients.Add plain stuffing cubes (dried bread crumbs (day old, oven toasted cubes of bread), Stir , ad another 16 oz of chicken stock, lower heat, cook until crumbs thoroughly saturated.


Type-A Parent New York City Bootcamp (Focus: Brand-Blogger Relations)
Related Posts Plugin for WordPress, Blogger...

Back to TOP